Lunging is perhaps one of the most unfamiliar skills for many new equestrians. Coaches lunge for various reasons, including improving a horse’s way of going, starting or teaching a young horse new skills, detecting lameness, exercise and even reinforcing a student’s riding position. The skill needed to lunge a horse safely and effectively can be learned through the Equine Canada Learn to Ride Program (Rider Levels 5 to 8) and the Equine Canada Coaching Certification Program.
In the coaching evaluations administered by provincial sport organizations – in this case the OEF – candidates must demonstrate proficiency in lunging. This is often one of the hardest parts of the evaluation for a candidate to be successful, especially if lunging is not part of your normal training routine.
The criteria for lunging differ with each type of coaching certification.
- Instructor of Beginners candidate lunges an experienced horse with a beginner rider
- Competition Coach candidate teaches a student on the ground to lunge an experienced horse safely
- Competition Coach Specialist candidate lunges a horse to demonstrate an improvement in the horse’s way of going
There are several simple tips to follow that will make your lunging skills better.
1) Know the equipment
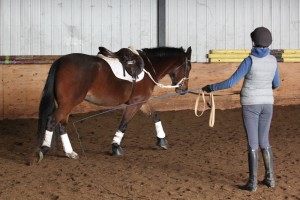
Lunging equipment includes front/back brushing boots, front bell boots, a long (8m+) lunge line with a clip (no chain), side reins and saddle or surcingle, bridle or cavesson, and a lunge whip. Fitting the tack so that there are no flapping or loose pieces is vital. Understanding the reason for each piece of tack is essential.
2) Set up a safe lunging environment
You need a clear space in an enclosed area to lunge. You must ensure the space has level footing to reduce the potential for horses slipping or causing damage to their legs. Enclosing your lunging area – using a round pen or creating a barrier around the space with cavalettis – helps your horse stay in a controlled circle.
3) Keep your circle large and round – Your circle should be 15m to 20m. Any smaller and your horse will put too much strain on their joints. While a little movement in the centre of the circle is necessary, too much movement is not desirable. If you start walking around in the centre of the lunging circle, the horse’s circle will move to accommodate the shape you are creating. If the horse cannot make a symmetrical circle because the shape keeps changing, they will not be able to engage and find roundness, suppleness or rhythm.
4) Dress appropriately
Wear gloves to protect your hands from burns if the lunge line is pulled quickly. Always wear boots when working with a horse to protect your feet. Never wear spurs to lunge because if you are keeping a tight circle in the centre of your lunging circle, spurs can get caught on each other. A helmet is essential when working with a horse in motion – protect your brain!
5) Know the different methods for attaching a lunge line to your horse
A lungeing cavesson is ideal, but does not always fit the horse you are lunging. A normal halter can be used by less experienced handlers. For those with more experiencing lunging who are using a bridle, there are two commonly used methods:
- Barnum Method – Pass the line up through the bit ring over the horse’s head and snap to the top of the bit ring on the outside of the horse’s head. It is commonly used, however it needs to be completely undone when changing direction.
- Alternate (or Noseband) Method – Lunge line is wrapped around the cheekpiece on the left side, passed across the nose, wrapped around the cheekpiece on the right side, then clipped back to the line under the horse’s jaw. This method allows for changes of direction with no change in contact.
6) Keep your lunge line organized
The hand at the front of the circle (the direction the horse is moving) is the connection to your horse. The line should be untwisted to ensure clear communication. The lunge line can be held between thumb/forefinger like a sword or coming up through your hand from between ring/pinky to between thumb/forefinger like a rein. Holding the lunge line in two hands allows you to feed or collect the line as needed. Never wrap the line around your hand. Instead, use large loops, or butterfly the line back and forth across your palm. Practice holding both lunge line and whip and using them effectively. They must not trail on the ground as they become tripping hazards for the person lunging.
7) Keep the pace controlled
Keep to slower paces when starting to lunge. Lunging a horse out of control can cause a dangerous situation to develop very quickly. Teaching your horse to lunge quietly and respectfully will make the work being done more effective and useful.
8) Use your voice
One of the most effective aids you have when lunging is your voice. Volume tells your horse both how confident you are and keeps their attention. Intonation tells your horse the direction of a transition (i.e.: “If the tone goes up: tr-OT this tells the horse go up to trot”). The cadence of your voice tells your horse the pace being directed. Use the number of beats in the pace (i.e.: “Tr-ot, and Can-Ter”).
9) Use your body
You can move your body to influence your horse. The neutral position faces the direction the horse is travelling, turning more toward the direction of travel if the horse needs to be encouraged to move forward. To slow the horse down, use a slight tug on the lunge line and move toward the front of the horse facing slightly backward. As you become more experienced, you can also use the perimeter of your lunging area to slow the horse.
10) Practice, Practice, Practice
Practice as much as you can with as many different equine partners as possible. Practice under the guidance of a certified coach. If you don’t know one who can help you, contact the OEF and we will help you find one locally who can help you hone those lunging skills.
For more information on the Equine Canada Learn to Ride program, or becoming a certified coach, visit www.horse.on.ca


